IV. Product Import Manual
* * *
> **This document is a product import manual for the SafeMesh system**
> **Adaptation system version**: V1.0.0
> **Document version**: V1.0
> **Release date**: January 1, 2026
> **Published by**: EFFORT
* * *
# Document revision records
| Version number | Revision date | Summary of revisions | Reviser | Reviewer |
| --- | --- | --- | --- | --- |
| V1.0 | 2026-1-1 | Initial release | JLJ | Shyne |
* * *
# 1\. Preamble
## 1.1 Document Objectives
* Introduce the steps to import the system after the product is installed.
## 1.2 Target
audienceAudience
* Project manager
* Field engineer
## 1.3 Document Scope
* Product Import Steps
## 1.4 Related Documentation
* Prerequisite Document: System Overview and Installation Guide
* Related document: Software User Operation and System Administration Manual
# 2\. Specific
stepsSteps
## 2.1 System Login
1. Click "System Input" to enter the system page.

[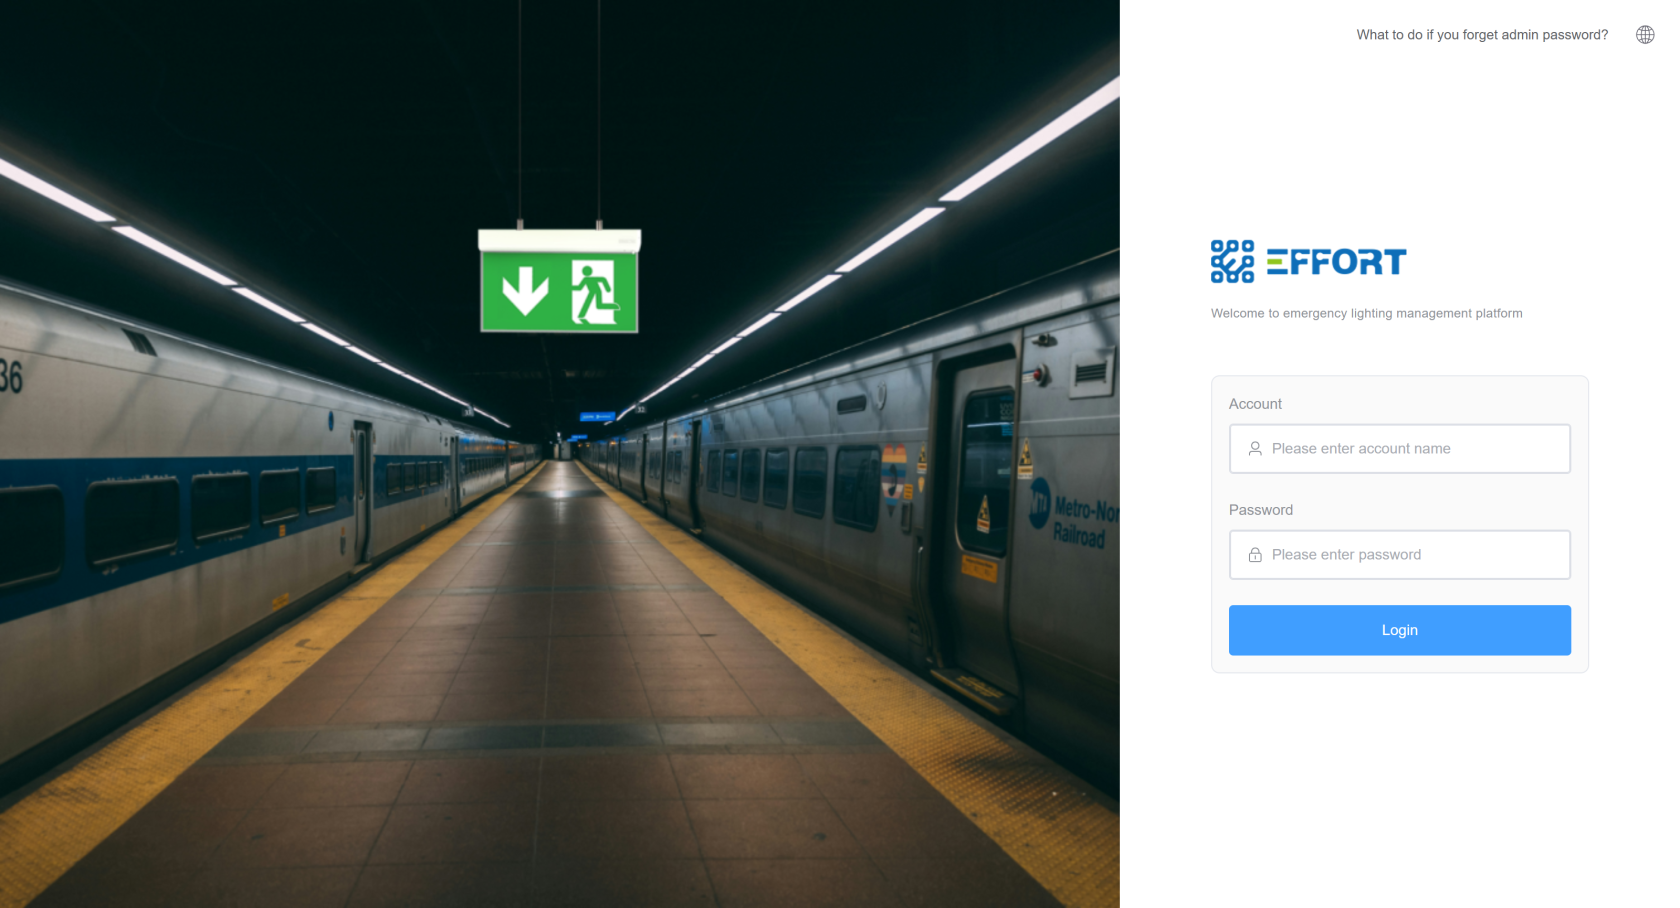](http://13.222.61.26:6875/uploads/images/gallery/2026-03/0L1image.png)
2. Password login, password will be changed after the initial password
```html
account:admin
password:123456
```
3. Login is successful
[](http://13.222.61.26:6875/uploads/images/gallery/2026-01/AIyimage.png)
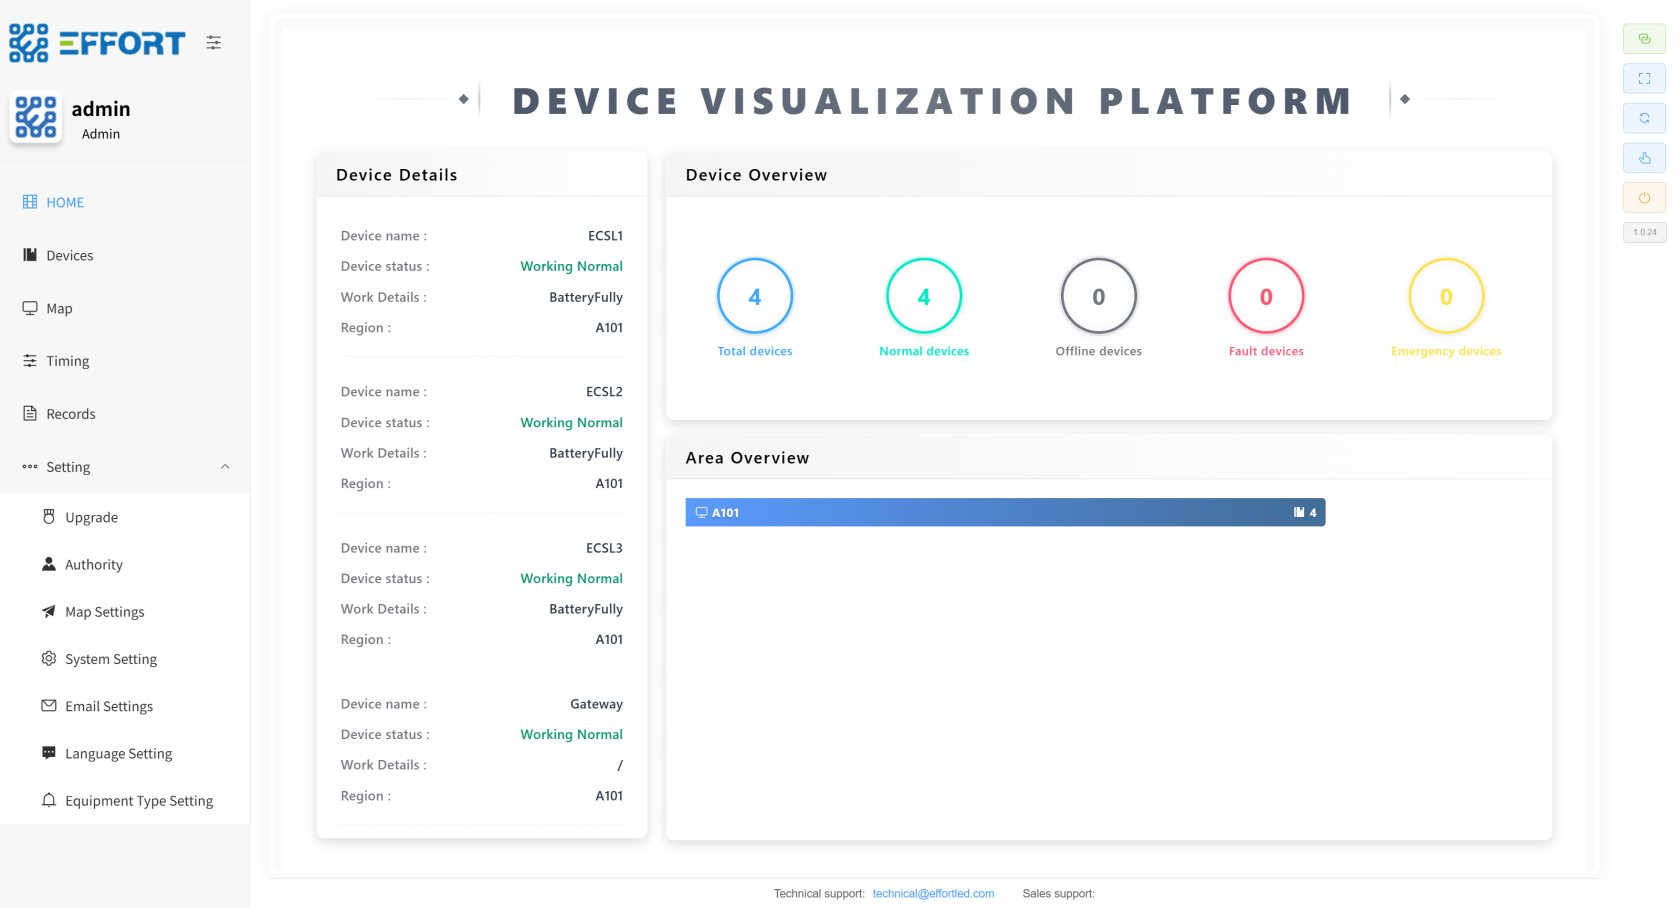
## 2.2 Enter the
installationInstallation guideGuide
1. Click the Install Start button
[](http://13.222.61.26:6875/uploads/images/gallery/2026-01/8oQimage.png)
## 2.3 Map
importImport
1. Do you need to import maps? If needed, tap Yes. If you don't need it, click Don't want it.
[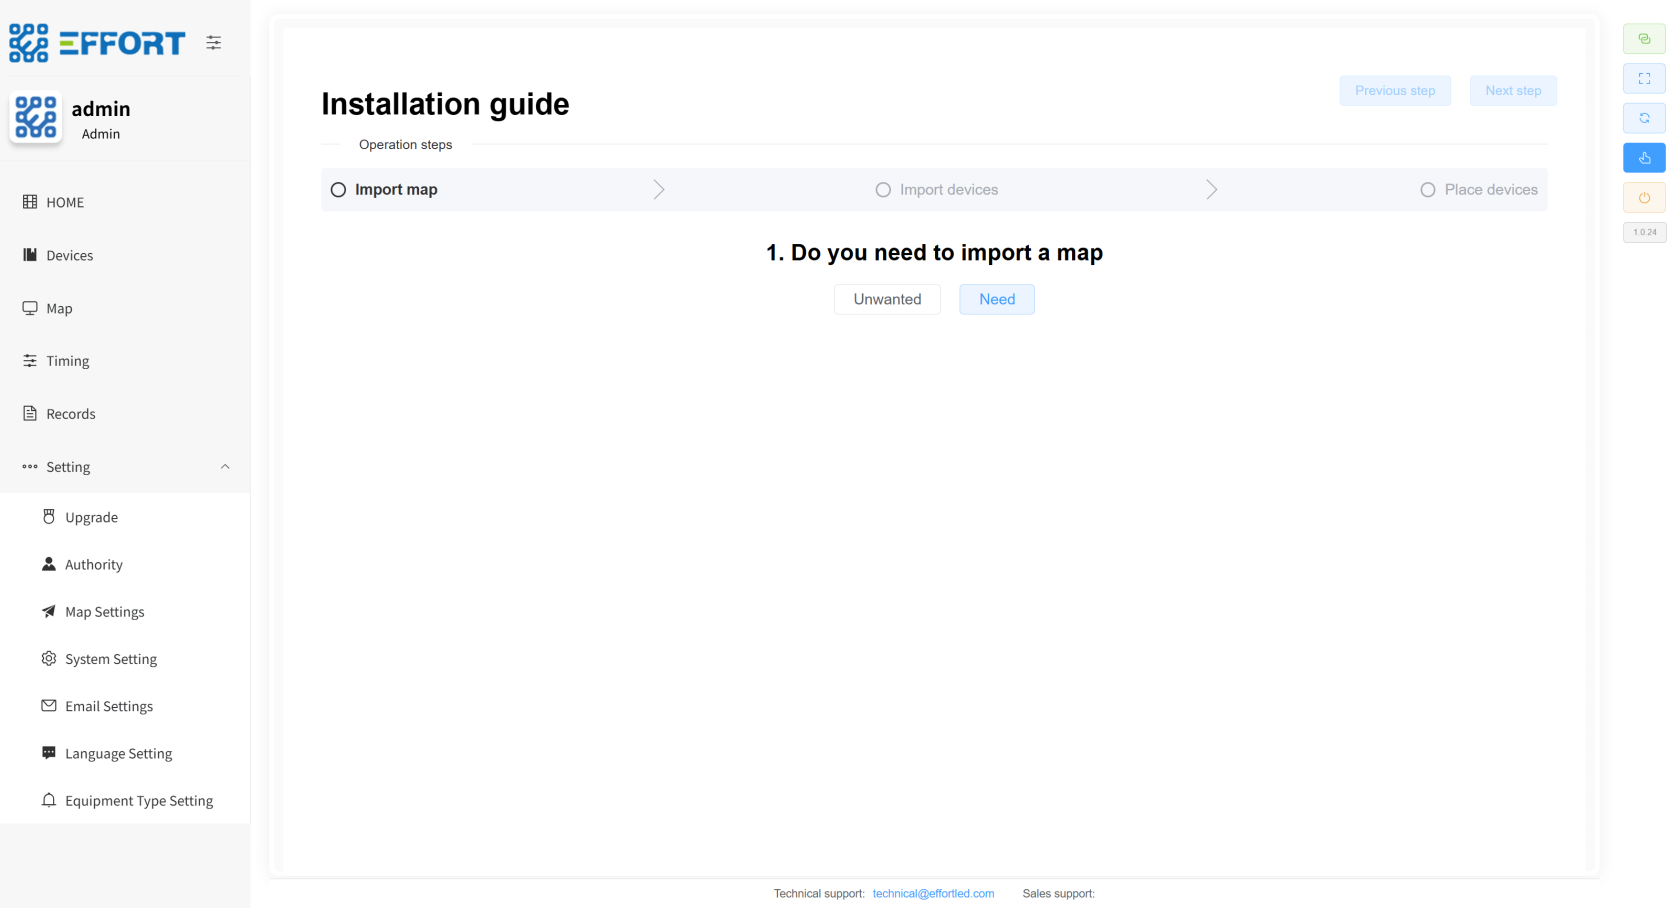](http://13.222.61.26:6875/uploads/images/gallery/2026-01/u4Limage.png)
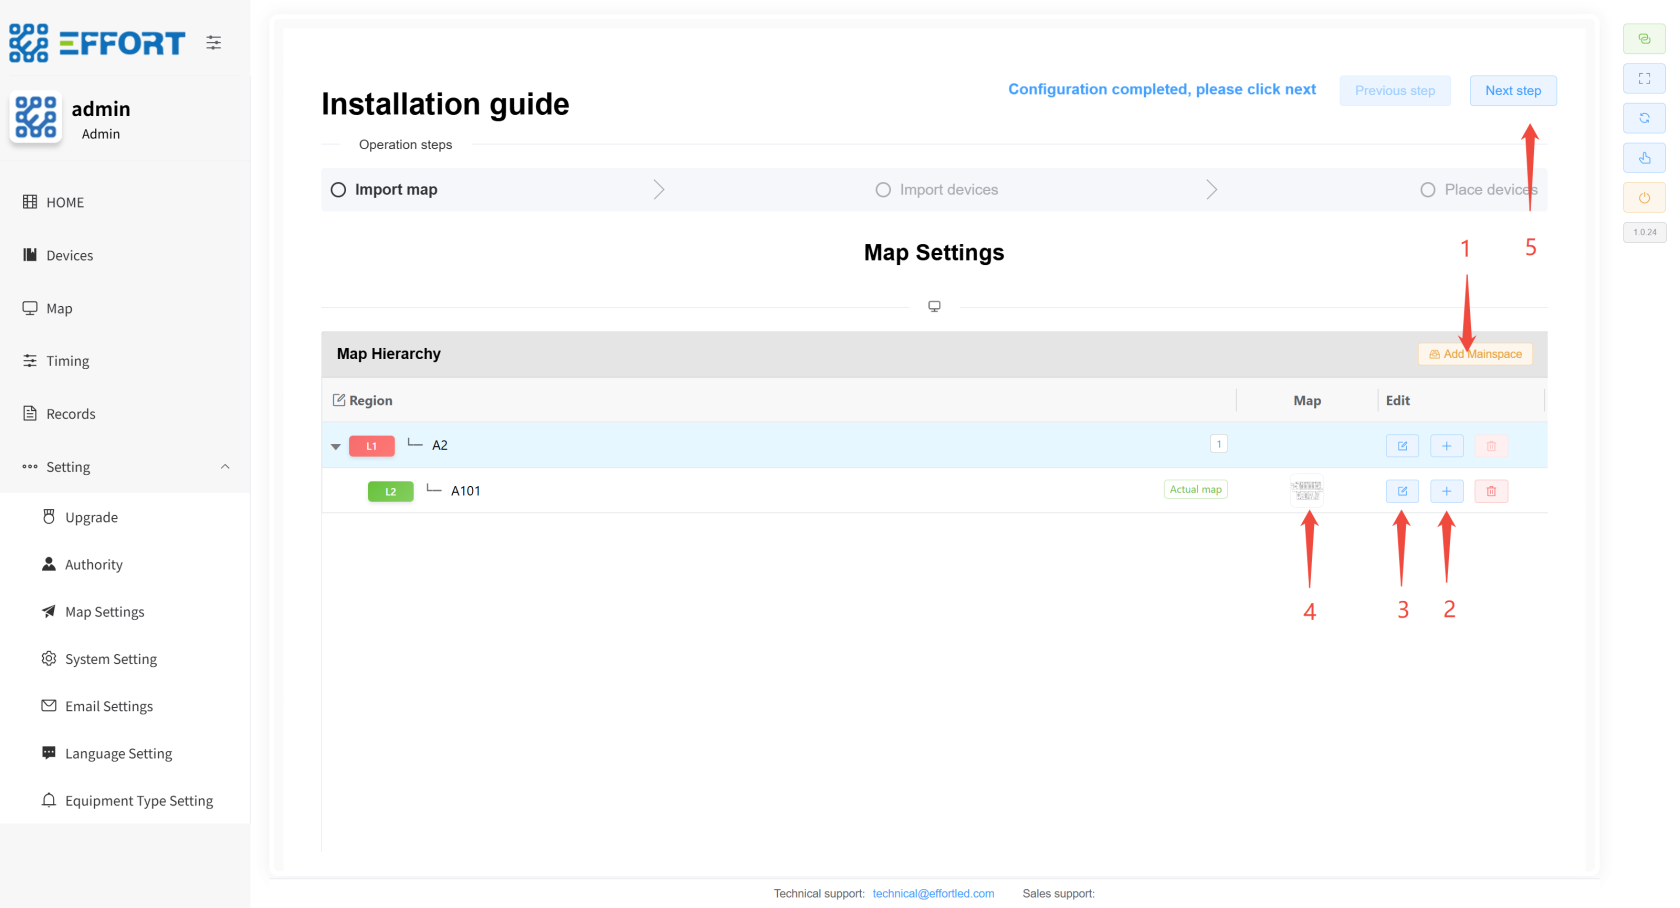
2. Map import steps
1. Click Add Authority to add the first level of area.
2. Click on the icon, Add, Secondary area, and you can continue adding......
3. Click the icon to modify the area name.
4. Upload a map of the area in the final level.
5. Once configured, jump to the next step.
[](http://13.222.61.26:6875/uploads/images/gallery/2026-01/OREimage.png)
## 2.4 Gateway and
deviceDevice importImport
1. Do you need to import a gateway? If needed, tap Yes. If you don't need it, click Don't want it.
[](http://13.222.61.26:6875/uploads/images/gallery/2026-01/MwVimage.png)
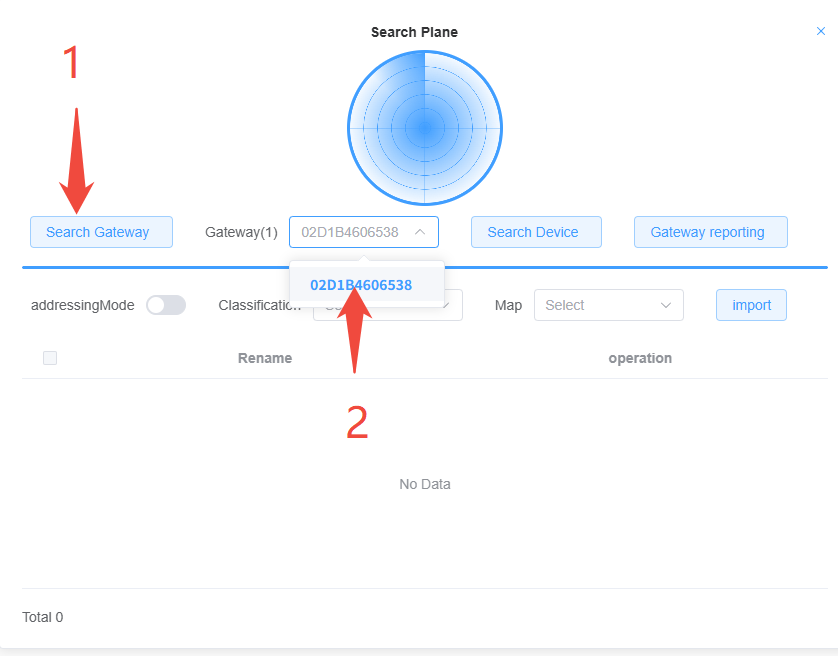
2. Gateway Import Steps
1. Click on the search gateway and wait for about 30 seconds.
2. Click Select the gateway you want to search.
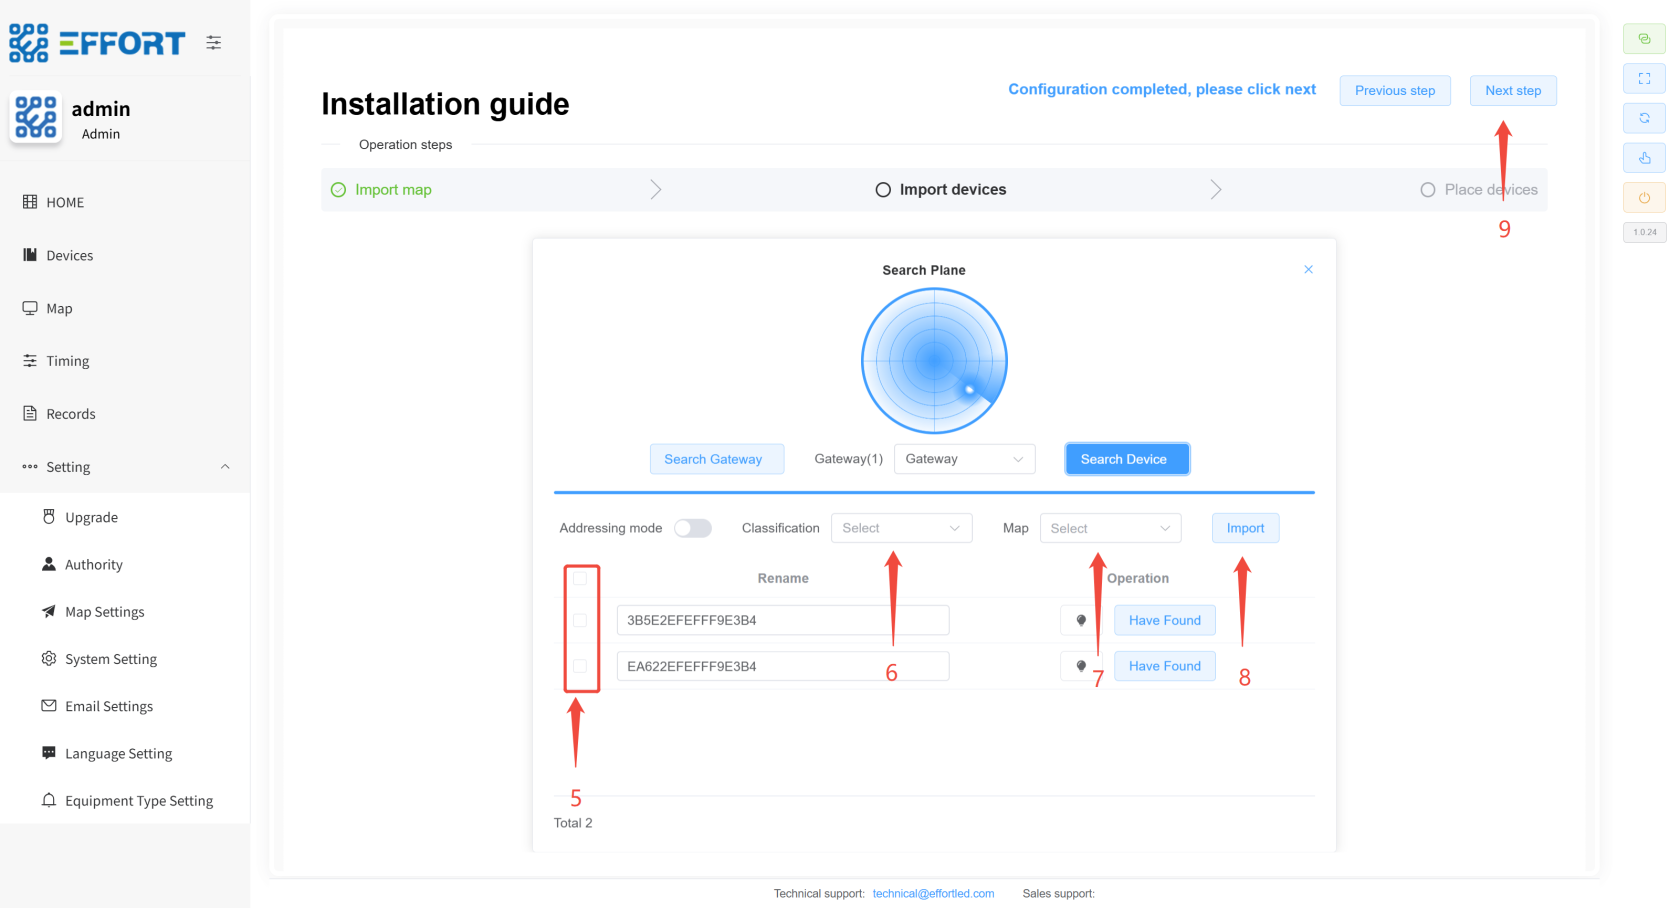
3. Device Import Steps
1. Select the gateway first
2. Click Search for devices
3. If you need to add a new device after the installation phase, select Gateway to open the network and search for a new device. If you do not need to add a new device, choose Gateway to report the current device.
4. Click Search for devices
5. Select the device
6. Select the device category
7. Selected regions
8. Click Import
9. Once configured, jump to the next step

[](http://13.222.61.26:6875/uploads/images/gallery/2026-01/HH7image.png)
## 2.5 Equipment
placementPlacement
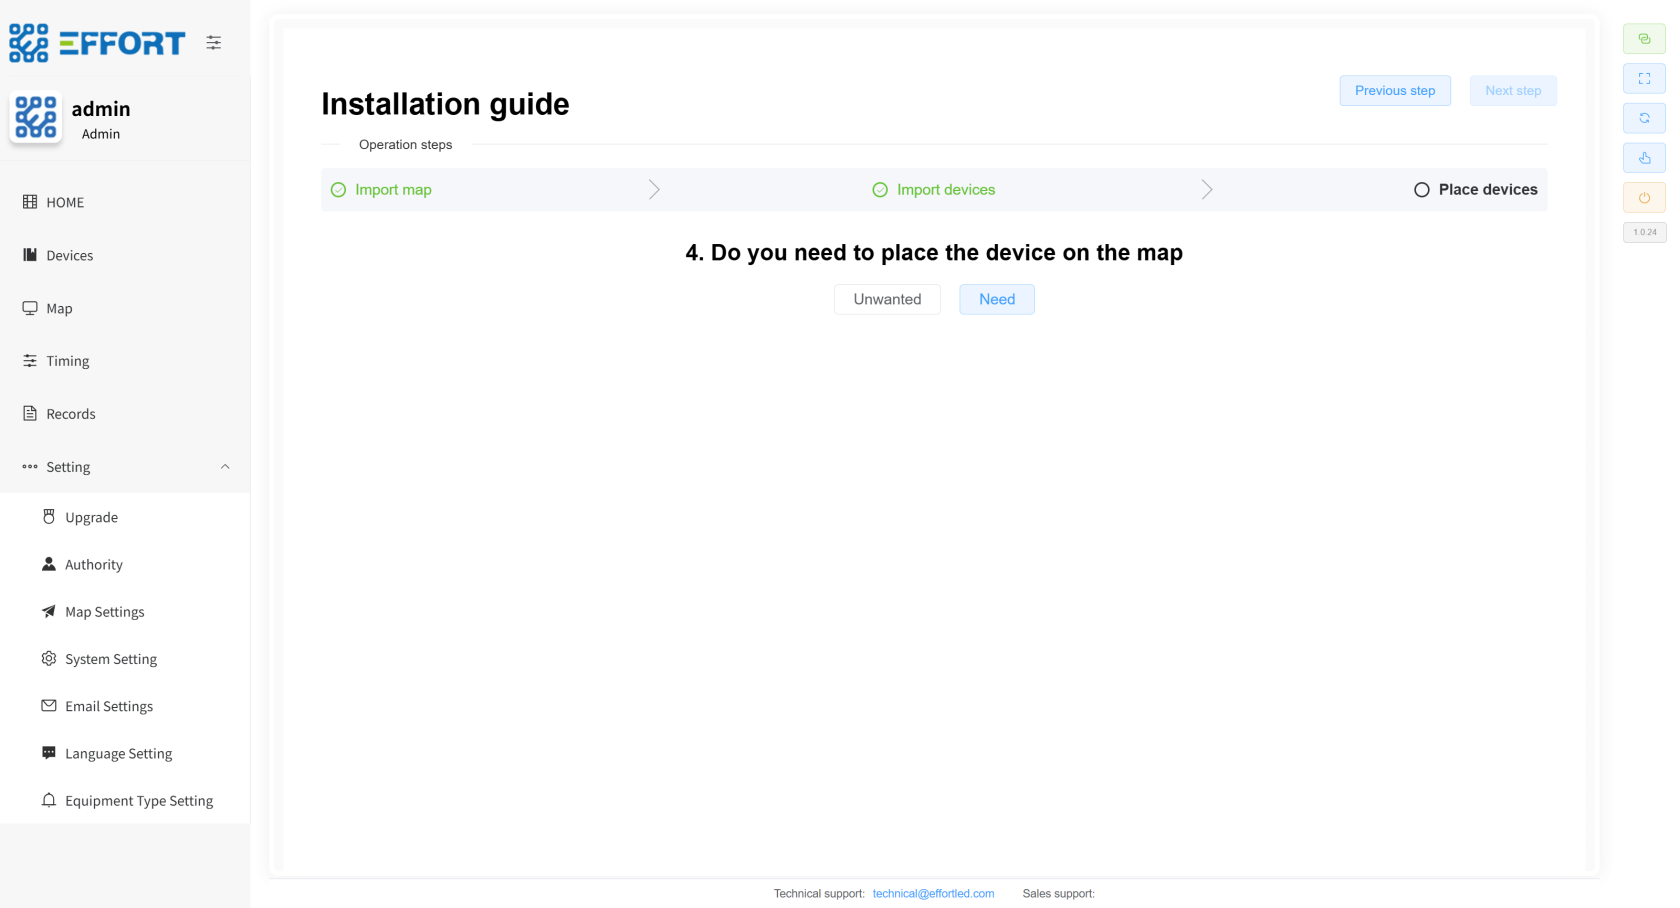
1. Do you need to put your device in a specific area? Click Yes if you need it, and select No if you don't need it.
[](http://13.222.61.26:6875/uploads/images/gallery/2026-01/nzGimage.png)
2. Device Import Steps
1. Left-click and long-press the device to drag it into the map.
2. Once configured, jump to the next step.

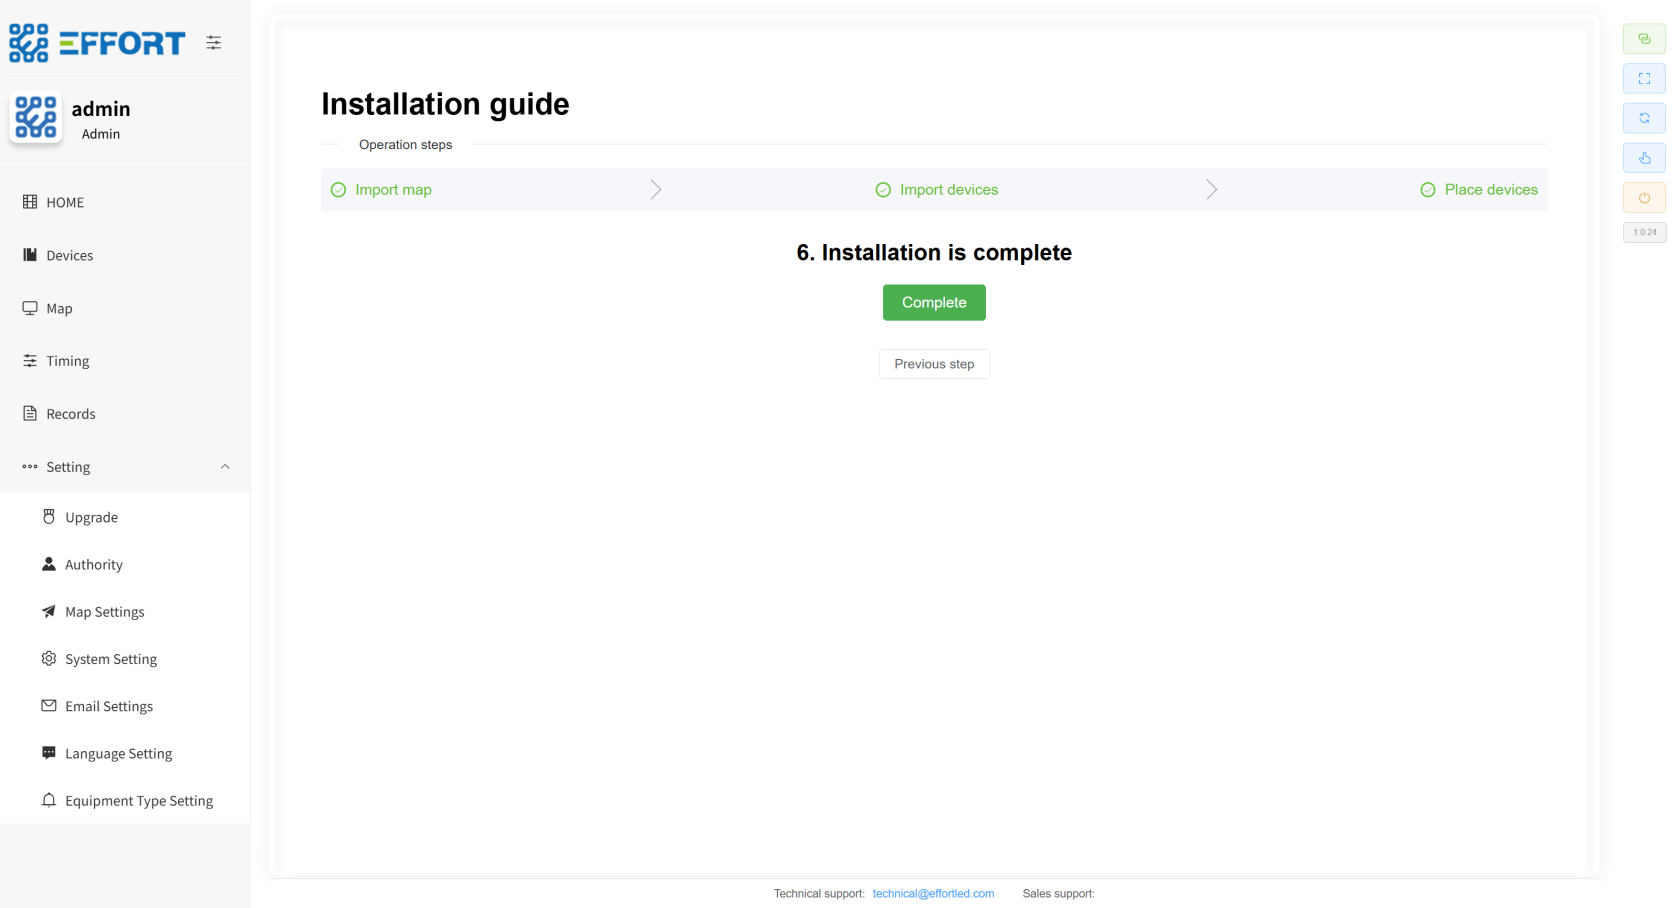
## 2.6 Import
completedCompleted
This step indicates that the product has been imported into the system
[](http://13.222.61.26:6875/uploads/images/gallery/2026-01/Dtbimage.png)
