IV. Product Import Manual
# Cover* *
Product/System*
Name> Logo**This document is a product import manual for the SafeMesh system**
> **Adaptation system version**: V1.0.0
> **Document version**: V1.0
> **Release date**: January 1, 2026
> **Published by**: EFFORT
*
Document title: << Product Import Manual >
>* *
Applicable product/system version
* Document version number (e.g., v1.0)
* Release date
* Company Name & Logo
# Document revision records
| Version number | Revision date | Summary of revisions | Reviser | Reviewer |
| --- | --- | --- | --- | --- |
|
v1.V1.0 |
YYYY-MM-DD2026-1-1 | Initial release |
NameJLJ |
NameShyne |
* * *
#
Preface1\. Preamble
##
1.1 Document Objectives
* Introduce the steps to import the system after the product is installed.
##
1.2 Target audience
* Project manager
* Field engineer
##
1.3 Document
scopeScope
* Product Import Steps
##
1.4 Related
documentationDocumentation
* Prerequisite Document: System Overview and Installation Guide
* Related document: Software User Operation and System Administration Manual
#
2\. Specific steps
##
2.1 System
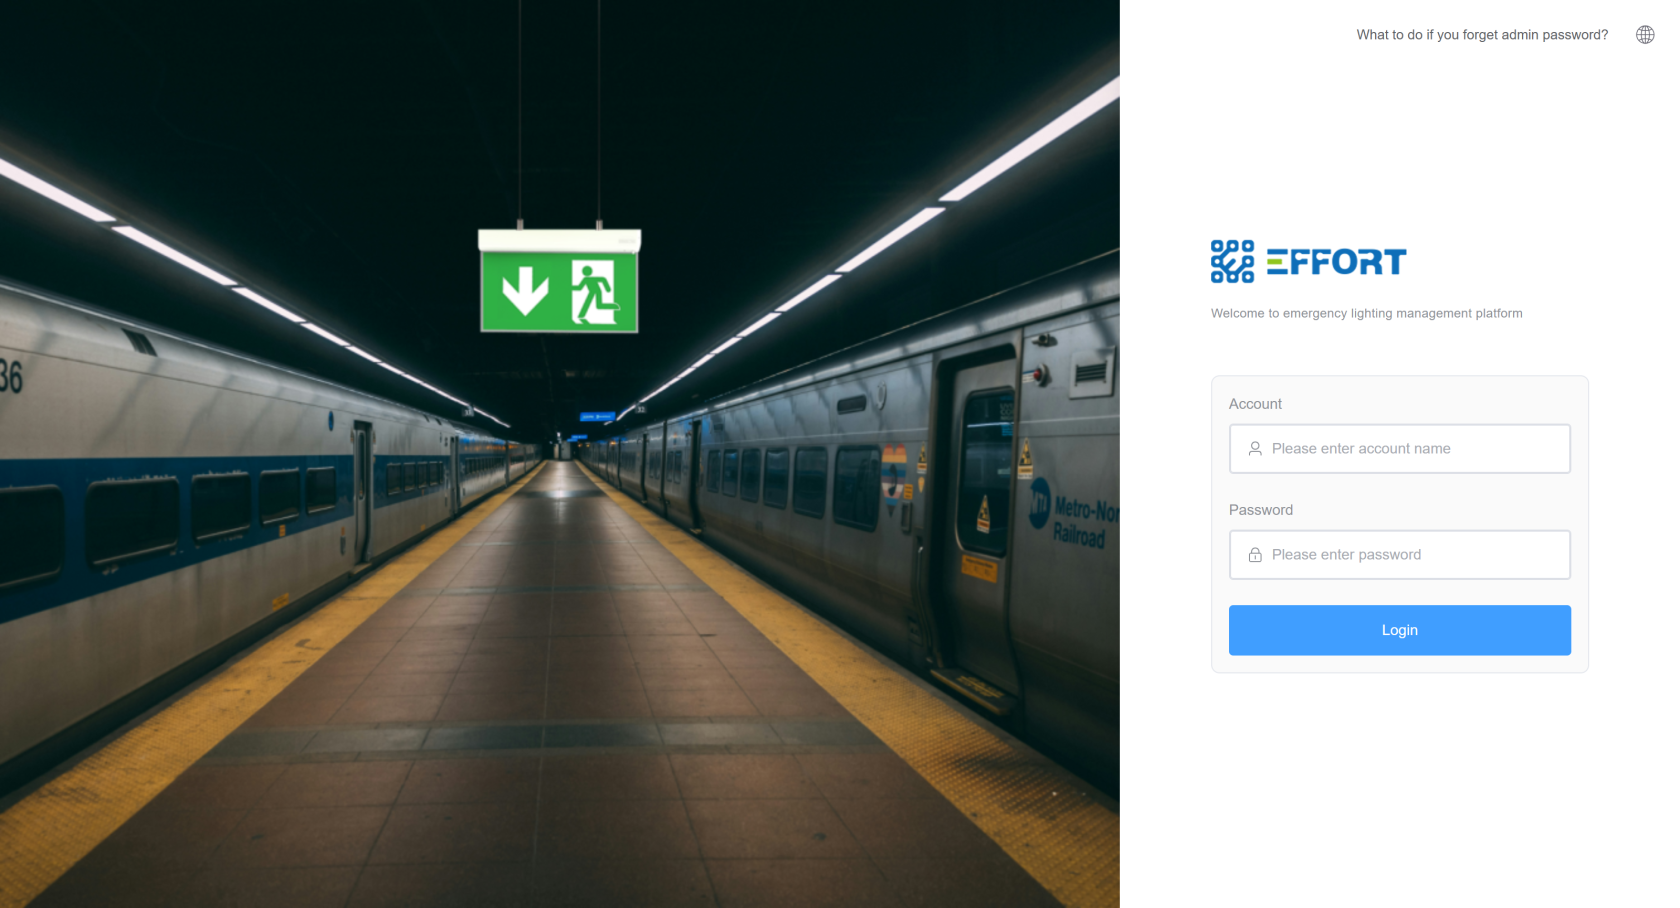
loginLogin
1. Click "System
Entry"Input" to enter the system page.

[](http://13.222.61.26:6875/uploads/images/gallery/
2025-12/Qcnf3f3bldfmoomybxrouwclba1nuc.2026-03/0L1image.png)
2. Password
loginlogin, password will be changed after the initial password
```html
account:admin
password:123456
```
3. Login
is successful
[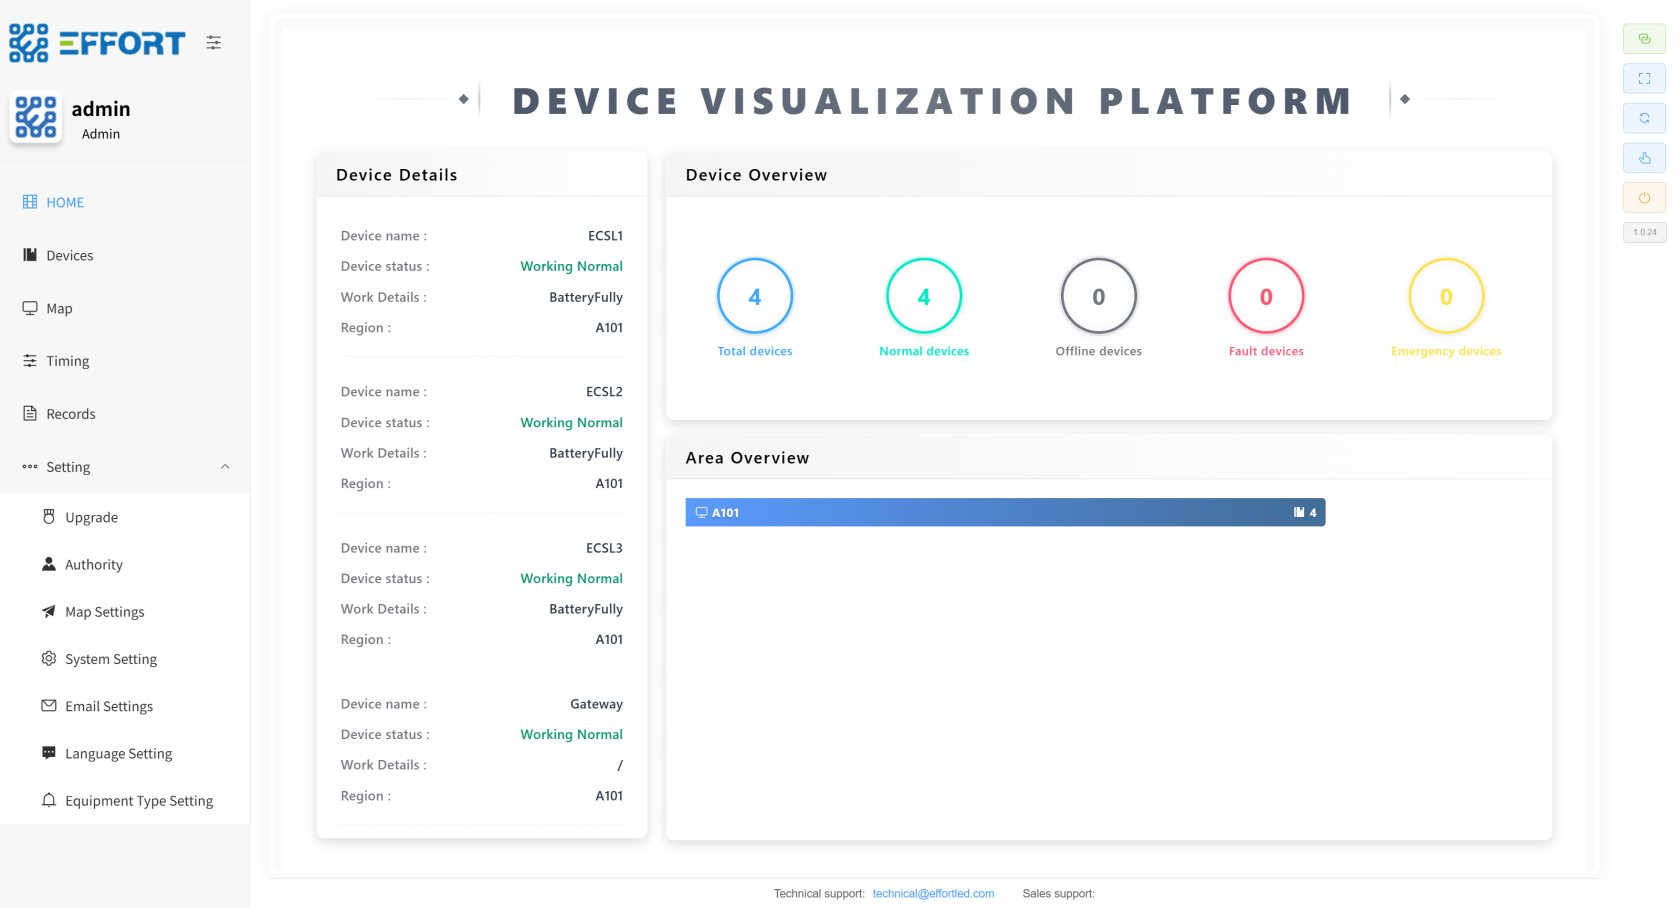](http://13.222.61.26:6875/uploads/images/gallery/2026-01/AIyimage.png)
##
2.2 Enter the installation guide
1. Click the Install
BootStart button
[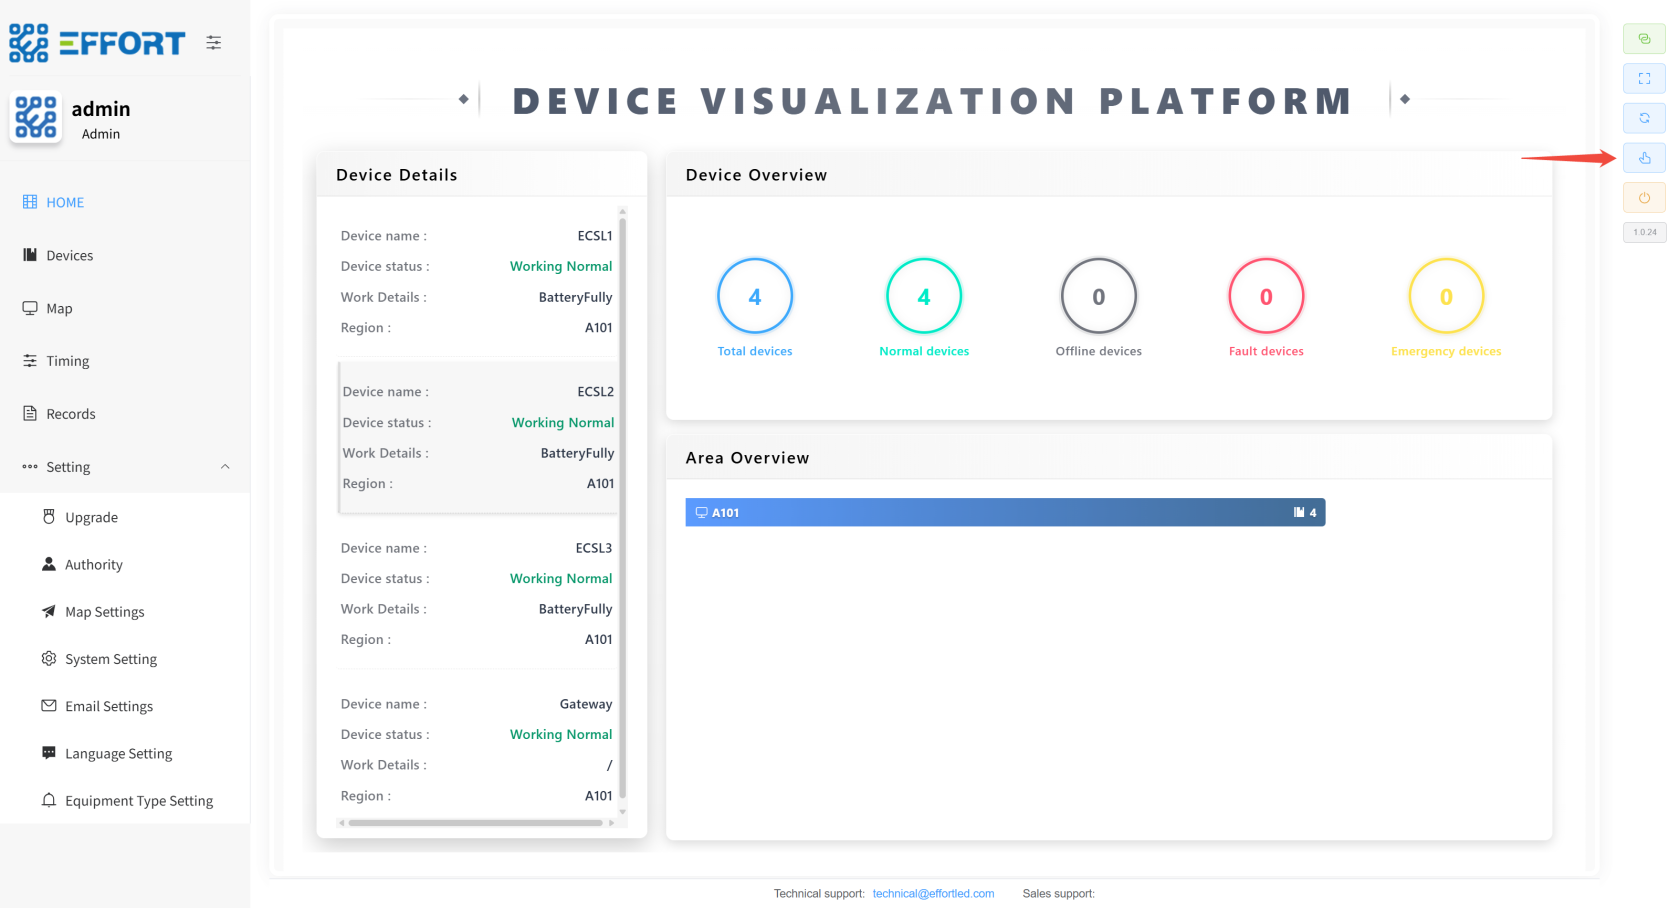](http://13.222.61.26:6875/uploads/images/gallery/2026-01/8oQimage.png)
##
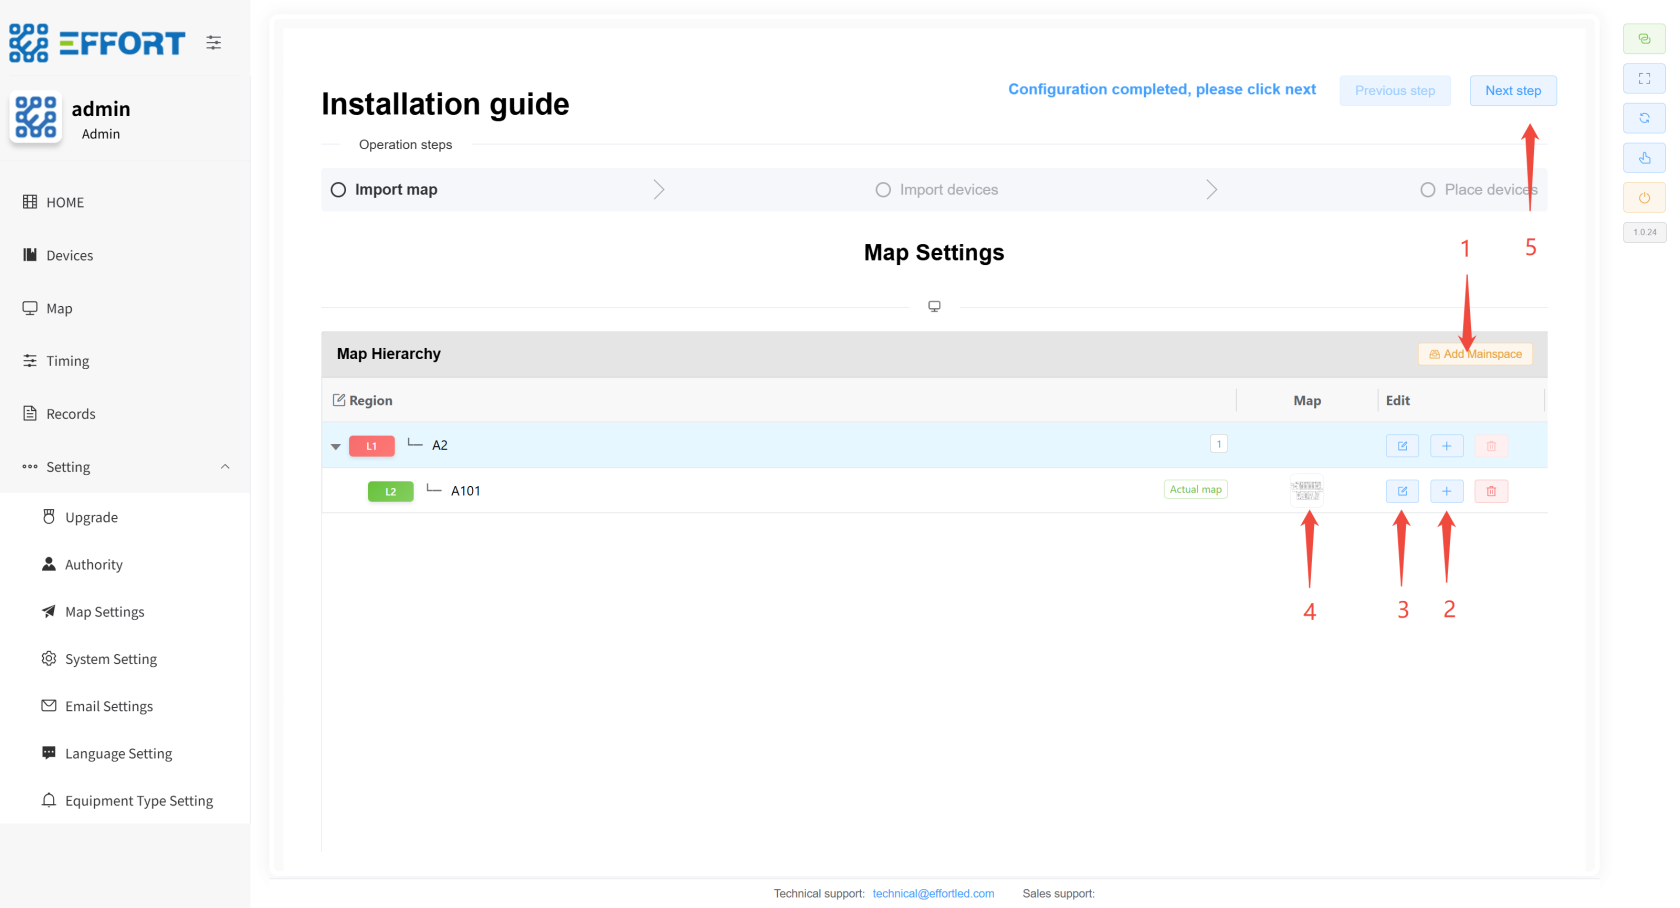
2.3 Map import
1. Do you need to import maps? If
needed, tap Yes. If you
don't need
to,it, click
need.Don't Ifwant not, click unwanted.it.
[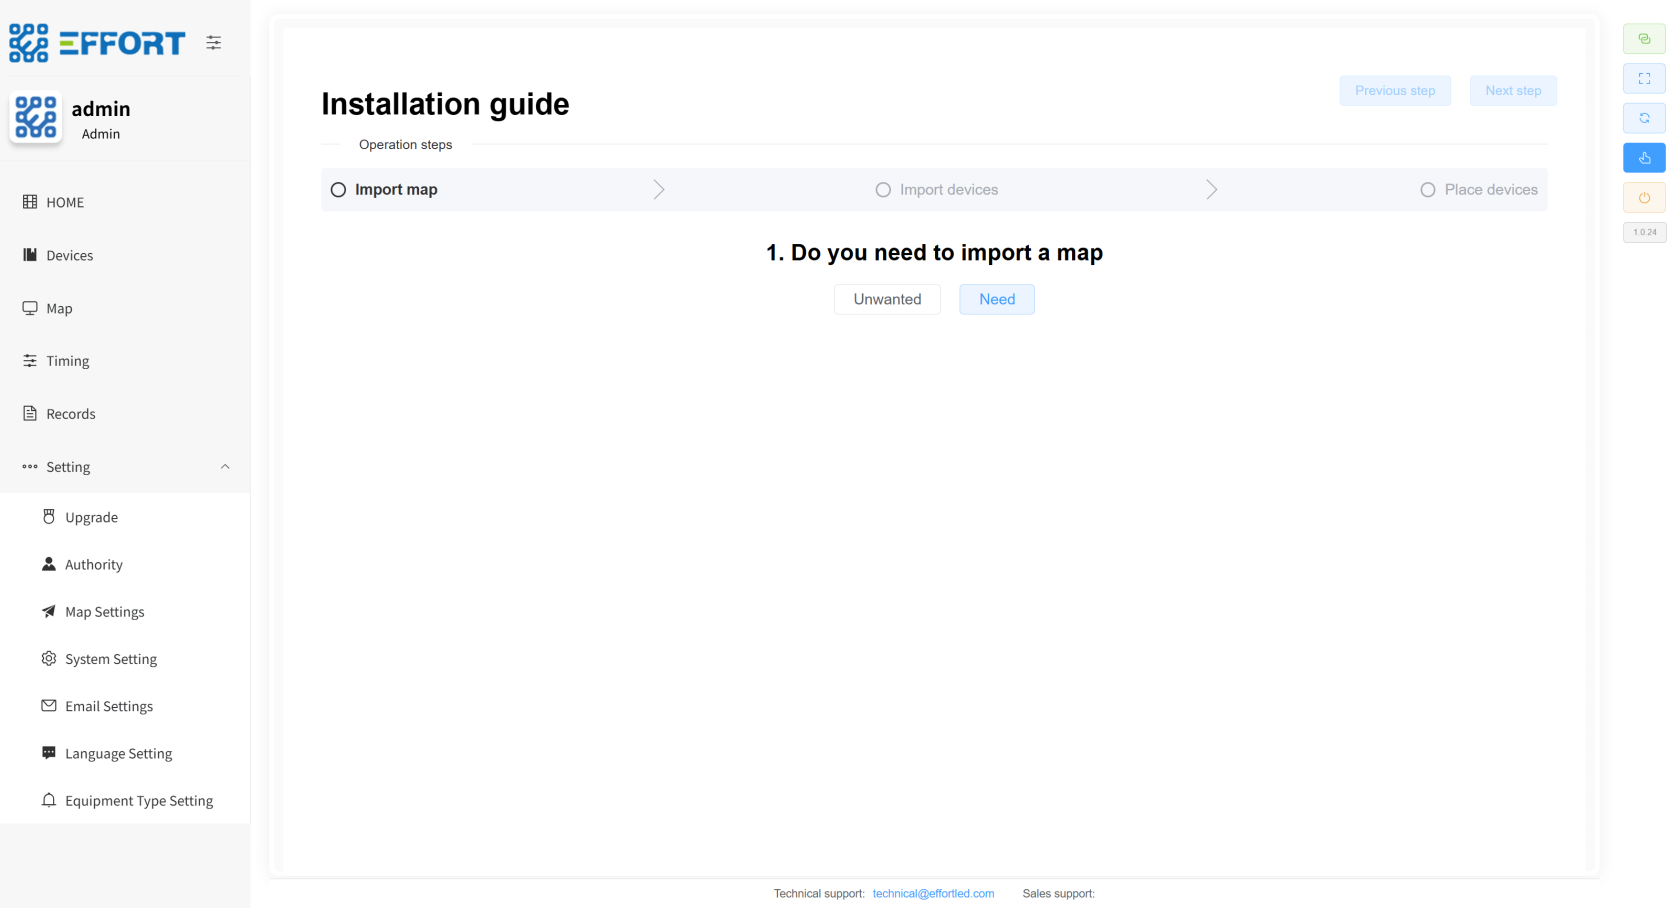](http://13.222.61.26:6875/uploads/images/gallery/2026-01/u4Limage.png)
2. Map import steps
1.
clickClick Add
MainsapceAuthority to add the
first-first level
of area.
2. Click
on the icon,
add,Add, secondarySecondary area,
and you can continue
to add down.adding......
3. Click the icon to modify the area name.
4.
InUpload thea lastmap level area, uploadof the area
map.in the final level.
5.
ConfigurationOnce is complete,configured, jump to the next step.
[](http://13.222.61.26:6875/uploads/images/gallery/2026-01/OREimage.png)
##
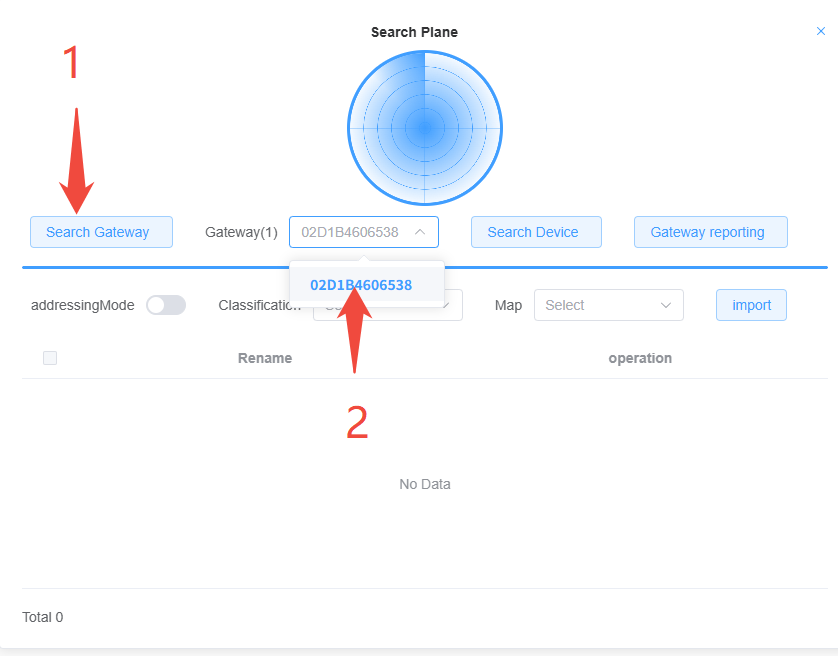
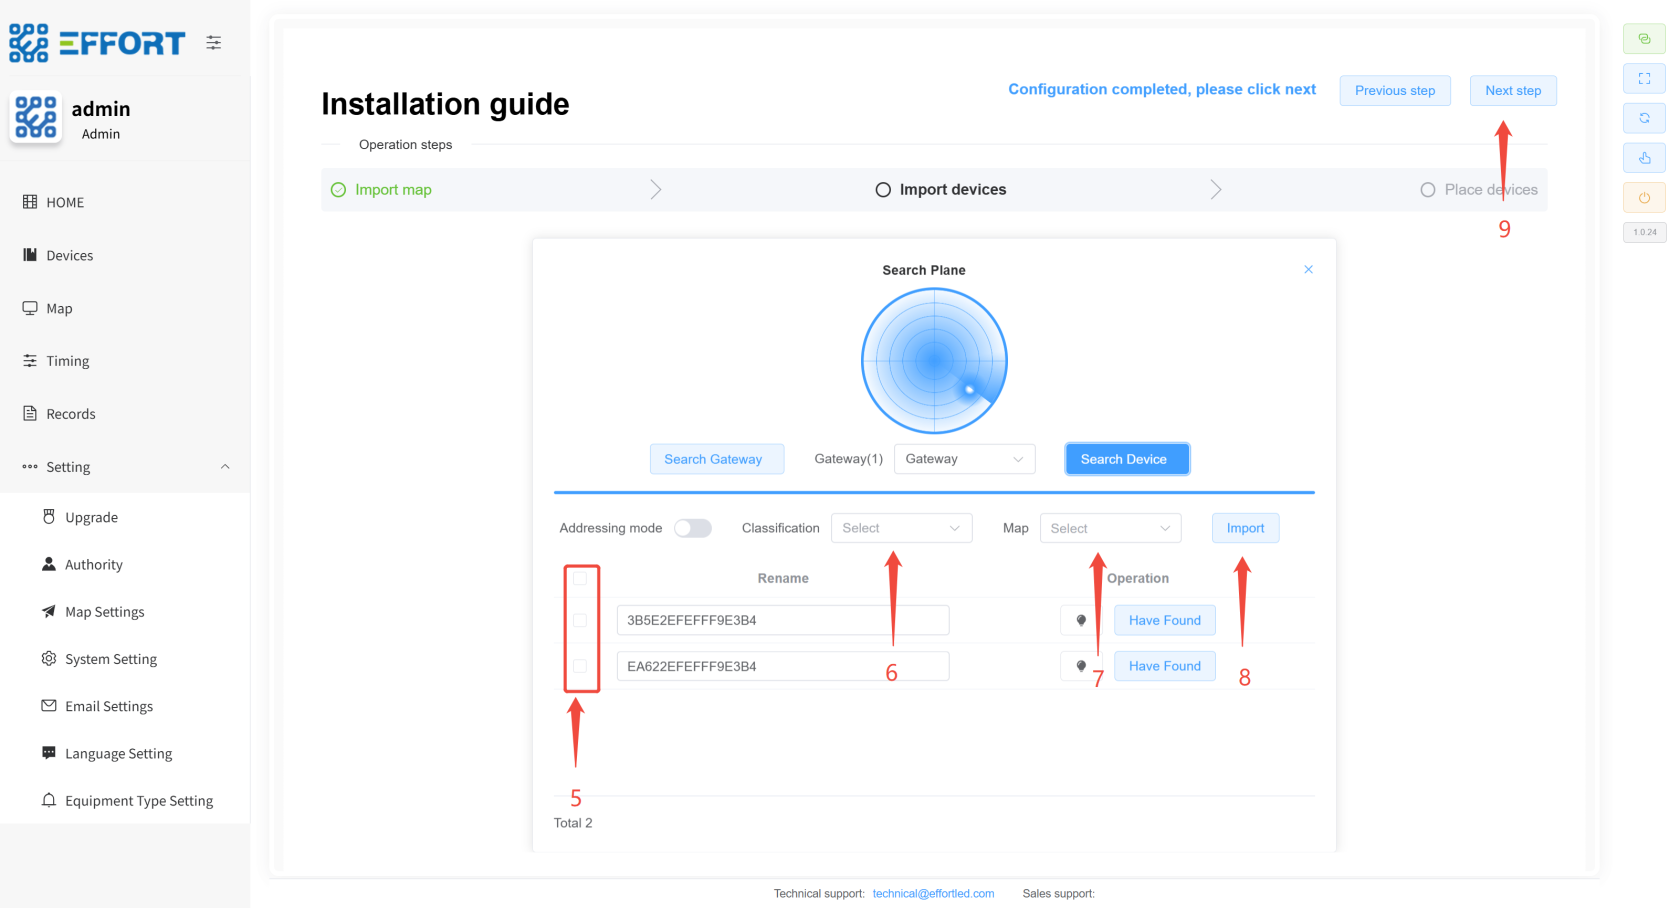
2.4 Gateway and device import
1. Do you need to import
thea gateway? If
needed, tap Yes. If you
don't need
to,it, click
need.Don't Ifwant not, click unwanted.it.
[](http://13.222.61.26:6875/uploads/images/gallery/2026-01/MwVimage.png)
2. Gateway
importImport stepsSteps
1. Click
Searchon Gatewaythe search gateway and wait for about 30 seconds.
2. Click
to selectSelect the
searchedgateway gateway.you want to search.
3. Device
importImport stepsSteps
1. Select
Gatewaythe gateway first
2. Click Search
Devicefor devices
3. If
new devicesyou need to
beadd addeda new device after the installation phase, select
"Gateway
opensto open the network and
searchessearch for
a new
devices."device. If
noyou newdo devicesnot need to
beadd added,a selectnew "device, choose Gateway
reportsto report the current
existing devices."device.
4. Click Search
Devicefor devices
5. Select
the device
6. Select
the device category
7.
SelectSelected regionregions
8. Click Import
9.
ConfigurationOnce is complete,configured, jump to the next step

[](http://13.222.61.26:6875/uploads/images/gallery/2026-01/HH7image.png)
##
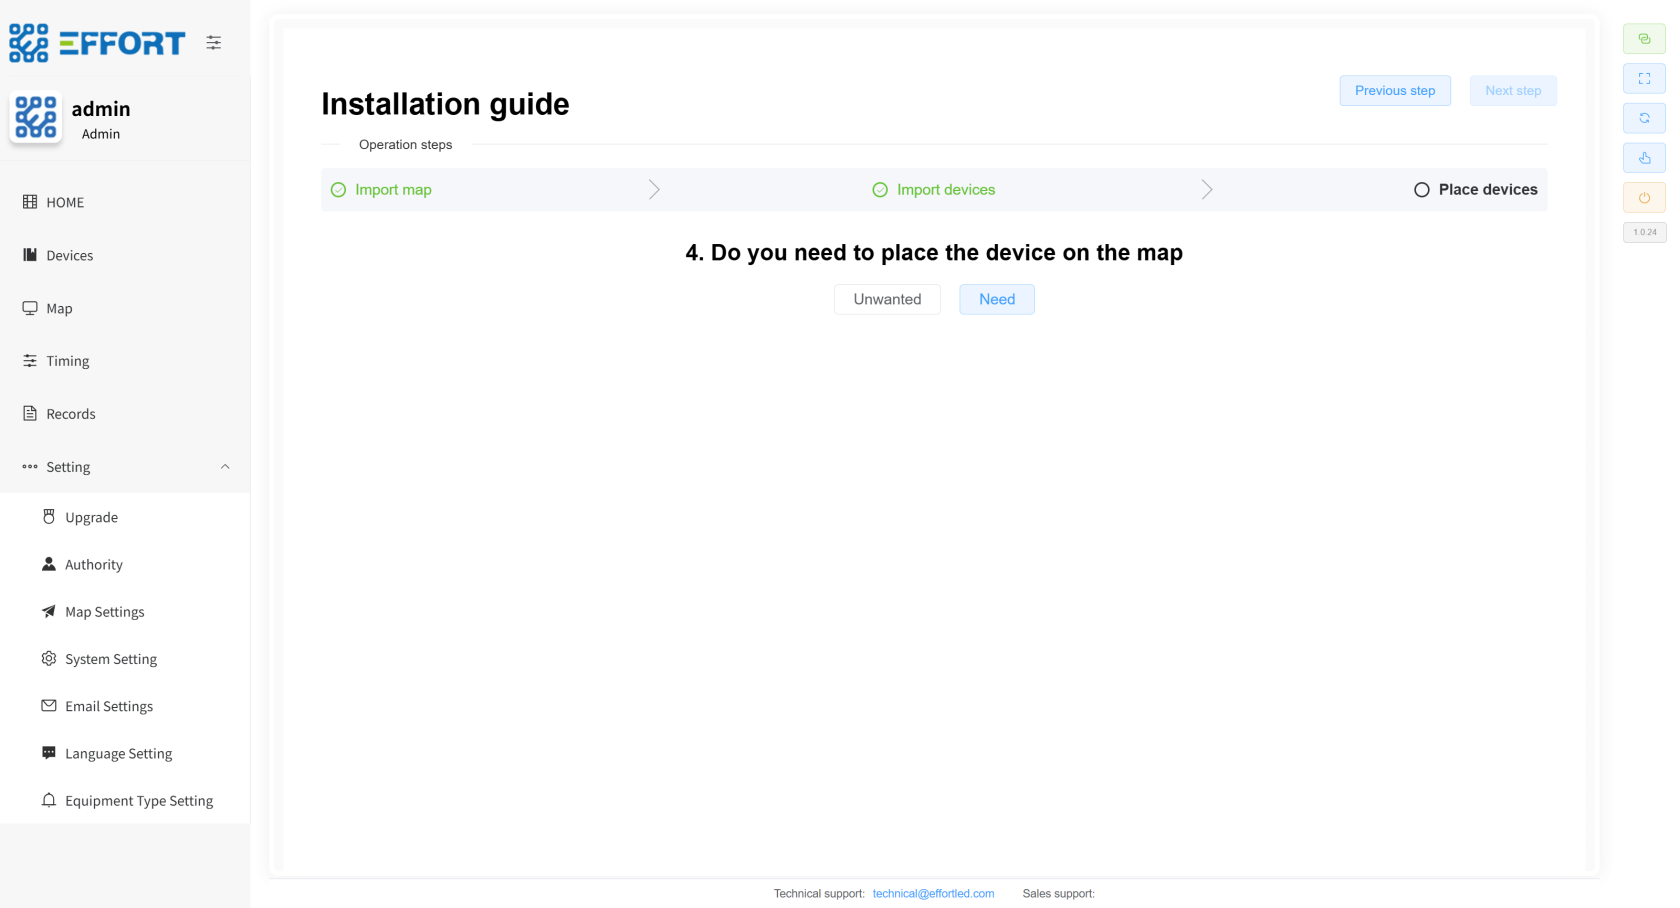
2.5 Equipment placement
1. Do you need to
placeput theyour device in a specific area? Click
needYes if you need it, and
clickselect unwantedNo if you don't need it.
[](http://13.222.61.26:6875/uploads/images/gallery/2026-01/nzGimage.png)
2. Device
importImport stepsSteps
1. Left-click and
holdlong-press the device to drag it into the map.
2.
ConfigurationOnce is complete,configured, jump to the next step.

##
2.6 Import
complete
1.completed
This step
representsindicates that the product has been imported into the system
[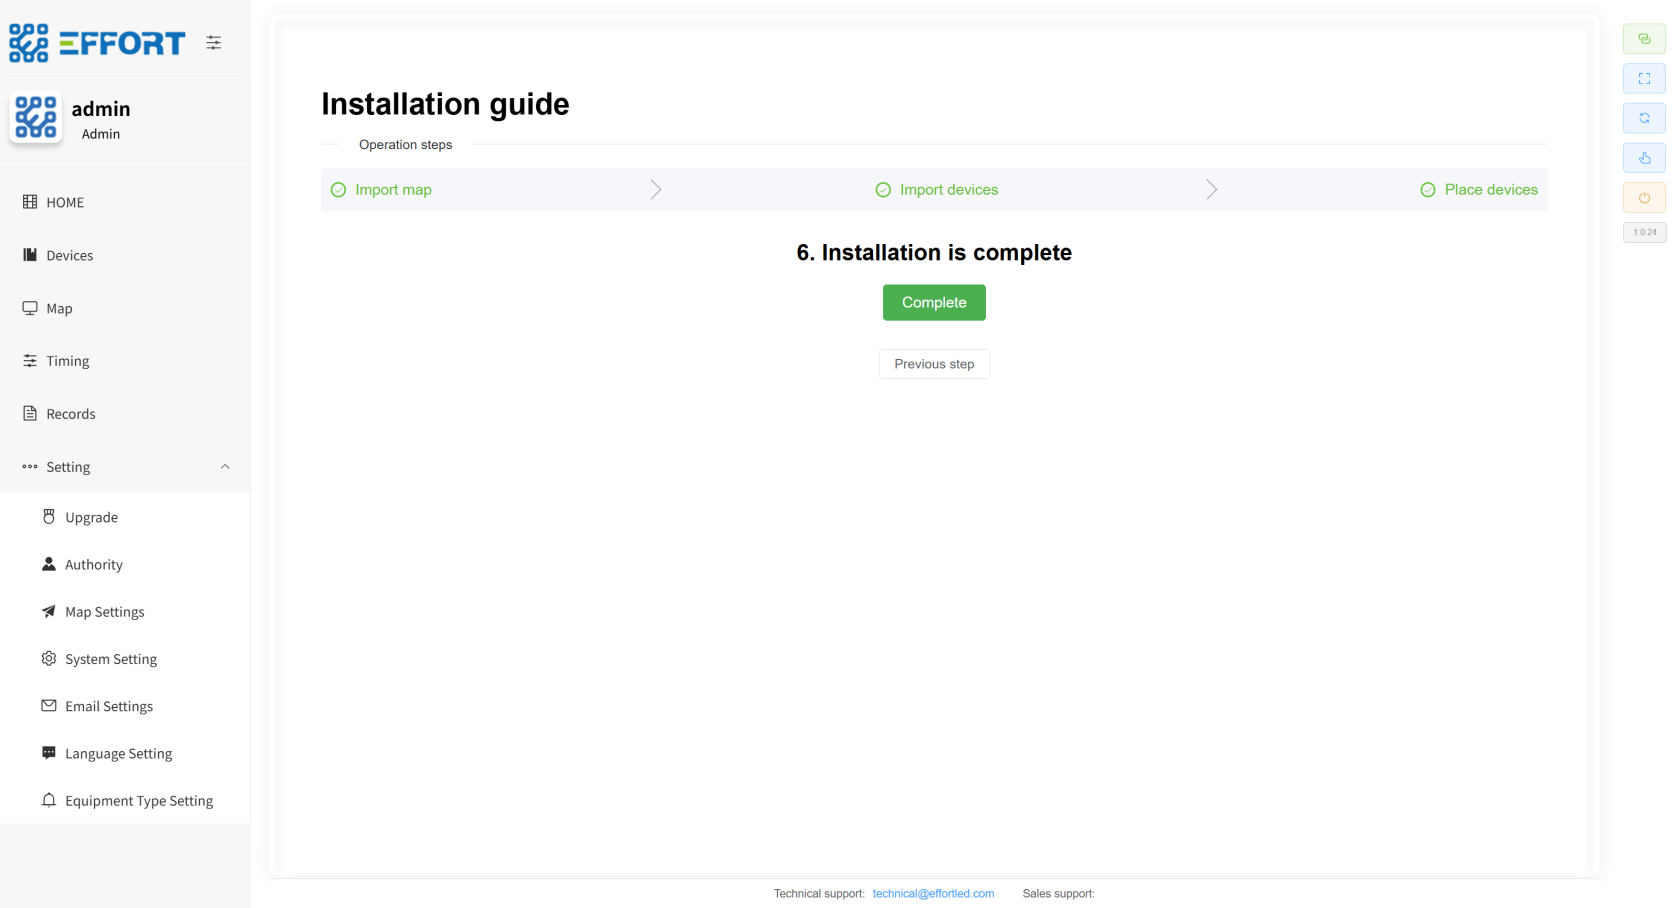](http://13.222.61.26:6875/uploads/images/gallery/2026-01/Dtbimage.png)
# Technical Support & Resources (SafeMesh has no content, for follow-up)
## Get help:
* Technical Support Portal URL
* Supported email addresses
* Support phone/hotline number
* Working hours
* Online community/forum links
## Quick Links:
* Provide the online document library URL if the document is online.
* List **direct download links** or find locations for all core documentation (such as product documentation download pages). (All the document name links mentioned earlier must be included here!) )
